Thursday, May 17, 2012

Day 16 - Minor stuff

I admit to not being very active lately, truth is I have so much to do. My band got a new record deal and we need to record a new album in a couple of weeks so basically all spare time is dedicated to that project at the moment. But do not worry, the restoration of the Cordoba will continue until it's done. As mentioned in the first post of this blog, updates may be days apart, or months apart, but I will complete the project!

Here's a couple of pics from the 16:th day in the garage!

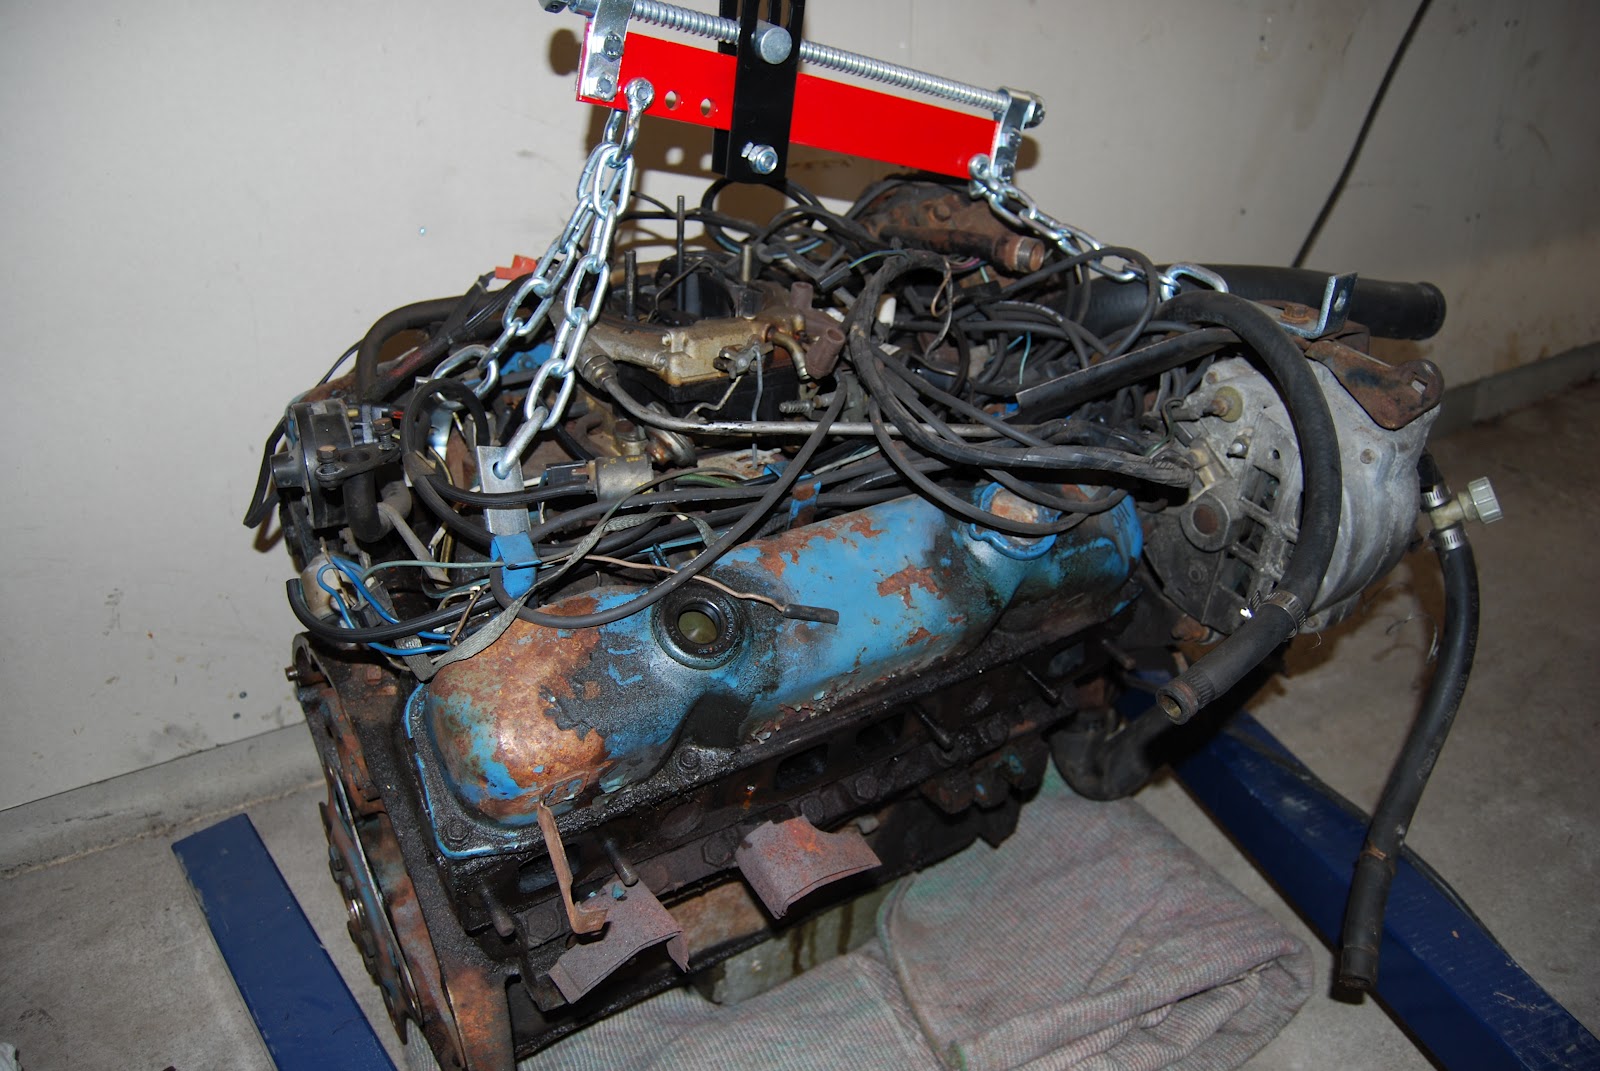
I went to the garage primarily to strip the last external components
off the engine. I wanted to remove the alternator bracket, but it's
attached to the water pump housing and the heater hose connector
fitting to the left of the thermostat housing is blocking one of the bolts.

It's impossible to remove the bolt without removing the pipe, but ofcourse
it's really damn stuck. So, I'm thinking I might have to cut it off. And
that shouldn't be a problem right? Since I intend to get a new water pump
housing I should have no problems finding new fittings for the new one?
Please comment on this.

I removed the two bolts securing the thermostat..

...and this is what the thermostat looks like once removed.

EGR. Just another problem source since emission laws in Sweden
started 1976 and this is a 1975. This won't find it's way back to the car.

EGR removed, two bolts secured it.

Went on to remove the water pump. As visible on the picture
all four bolts securing it has been removed, but it wouldn't
budge at all.

I used a soft head mallet to hit it repeatedly but nothing seemed
to happen. Well I had no other idea so I just kept hitting around
it and finally it came loose.

This is what the water pump looks like on the inside...

...and this is the housing. Looks like it was a good idea to take
this apart. Some kind of build-up inside.

Removed the bracket for the throttle and kick down linkage.
As visible on picture, two bolts. I've removed pretty much
every external part on the engine so far so I went on to the
vehicle itself.

Vents below windshield, just snapped into place and can be
removed by carefully prying with a screwdriver.

The two horns...

...fitted from the inside with one bolt each. Now removed.

And finally a question. I'm trying to get the crank in
TDC(top dead center) but I'm not sure if this is right.
The only marking I can find on the pully is a straight
line, on this picture aligned with the hole in the timing
markings. Can anyone tell me if this is indeed the TDC
on the Cordoba? I assume it is, but better safe than sorry!
Thank you all for your patience and for following my blog. There is a hell lot of more work to do on the project, but I kind of enjoy it. Not as much as riding in the car a hot summer day, but still, I know what I will get when I'm done! Stay tuned for more updates! ;)

Friday, April 27, 2012

Restoring... Toyota?

So, finally I got 5 hours in the garage...

...LOOKING at the Cordoba and longing for it! I've got four vehicles that could take me to work each morning. It just happens to be that four of them aren't working. :) So, I started with the one with the least work... A depressing toyota van that belongs to my father. I had to change the alternator and it was a boring and troublesome job.

Well, being in the same room as the Cordoba got me in a bit of a better mood so I'll be sure to continue work there soon. The next post will be about the engine and removal of the last external components to be able to tear it apart for the machine shop, then I think I should move on with the interior so I can remove the dash and all the components linked to it.

Well, I guess I need to take the weekend off. Sunday's my birthday, but you'll probably find one or two posts here during next week!

Wednesday, April 18, 2012

Day 15 - Engine getting naked!

So, I'm slowly getting there. While I'm waiting to get some help with removing the transmission I'm stripping all the external components off the engine so I can get the core components sent to the machine shop... This is the progress of day 15. Starting with the carburetor.

Start by removing the clip that holds the choke
to the carb and pull the lever out...

In each of the four corners of the carburetor there is a
bolt that holds it down. Two on the back...

...two on the front. After removal, pull the carb straight up.

The Carter Thermoquad seemed to be in a great internal condition.

Thermoquad on a shelf!

The intake manifold without carburetor.

The choke is attached with one bolt. This is a type of choke that
uses intake heat to determine how much the choke should open.
Basically a metal coil inside expands when heated, pulling the choke open.

On to the alternator, fitted with two bolts. Remove the
left of the two bottom ones to begin with, and then
remove the adjustment one on the top - alternator loose.

Alternator on a shelf! It will look nice to change this for a
smaller one-wire alternator in chrome.
I went on to remove the a/c compressor. Actually I forgot to take
a pic before removing it so this is afterwards. It was fitted with
two bolts on the front...
...and three on the back. Notice I removed the compressor together
with it's brackets. It seemed easier that way.

The choke also attaches to this with one cable. Attached with
one bolt as visible on picture.

The vacuum amplifier is fitted with two bolts on the
back of the engine.

The water pump hose is attached with a clamp that can just
be unscrewed and then twisted off.

And finally this is what the engine looks like at the moment.
Most external components are gone.
That's it for todays update. I will move on to remove the rest of the brackets and the distributor. This should preferably be removed with the crank in the top dead center. I will write more on this subject in the next update. Stay with me Cordoba fans!

Sunday, April 15, 2012

Day 14 - Shame on me!

Yeah, shame on me! I've not been out to the garage for a long time. Instead I took a two week vacation on Malta in the mediterranean! :) Got back just a couple of days ago and figured it was time to go to the garage.

I got some stuff done but the camera battery died so unfortunately I couldn't take any pictures of the removal of the starter(just one bolt securing it to the transmission bellhousing) and vents below windshield(just snapped into place by themselves). However, I went on to clean up the engine since I will need to begin work on it soon.

Removed most of the electrical wiring in the engine compartment.

Cables and hoses looks like a snakes nest. Time to remove everything...

Including cable for the temperature sending unit...

...and the engine oil sending unit.

This will all be replaced by a painless wiring kit!

A bit easier to overlook, eh?

I also vacuum cleaned the loose dirt off of it.
That's all for day 14. Kind of nice progress in just two effective weeks worth of work. I really need to get the transmission down soon but I need some help to do it. Will update blog shortly again!

Sunday, March 11, 2012

Quick update

No, the project, the blog or me hasn't died. :) Nearly though, I spent 3 weeks in a horrible flu and got better just a few days ago. Anyways, spent yesterday and today in the garage thinking the project through and started removing the front seat. Two nuts were really rusted out so I had to cut them loose and it took me several hours - that's why I have no pictures to show for today.

Stay with me and I'll do a nice update with lots of photos shortly!

Saturday, February 4, 2012

Day 13 - Cleaning the engine compartment.

So, engine might be removed but I still need to keep a good pace on the project to get it completed as soon as possible. ;) I went out for an hour today and started removing some components from the engine compartment. I think this stuff wont find its way back to my vehicle, I should do without because of the new components I am planning to add to the engine. Also, before 1976 in Sweden emissions wasn't that controlled, therefore I can remove the EGR system. My mindset is pretty much to eliminate as many sources of failure as possible.

This is the electronic ignition controller. Two bolts secure it.

The voltage regulator(2 bolts) and ballast resistor(1 bolt).

Close up of ballast resistor and cables.

Removing fuel pump by pulling the hoses.

Time to move on to the electric cables. Removed all clips attaching
it to the cowl in order to pull it out.

Somehow this does not look original, attached to the cowl just
above the power brake booster... Two bolts.

Removed the charcoal canister, 2 bolts on each side.

Cables starting to come out...

Nice and clean. A few hours more will help me get rid of all
components from engine compartment to make it ready for
some welding, sandblasting and paint.

Bagged and tagged, voltage regulator, EGR time delay controller,
electronic ignition controller and ballast resistor.

That's all for today friends. I'll see if I can get out tomorrow and continue the project.
Admit I am getting there! :)

Wednesday, February 1, 2012

Comment on engine removal.

I recieved a comment I thought I should share with you guys. :) Please keep in mind I am open to any suggestions on below information.


Hi and thank you so much for your comment! This is the first car I ever owned and the first car I ever restored, so I'm really new to this stuff. :)

Regarding the radiator, what will be the gains of a three row radiator? Better cooling? I am going to rebuild the engine and my plan as of now(I am open to suggestions) is to have the engine block and heads inspected at an engine shop to determine the condition.

If the heads are reusable with little restoration work from the engine shop I will keep them and add these components to my engine:

* Edelbrock 1406 Performer Carburetor(600 CFM)
* Edelbrock 2186 Performer Intake Manifold
* Edelbrock 2192 Performer-Plus Cam and Lifter Kits
* Edelbrock 1723 Performer RPM Street Fuel Pumps
* Hooker 5903-1HKR Hooker Competition Headers
* Summit Racing SUM-380459 Direct Fit Aluminum Radiators

As well as a following large list of oil pump, harmonic damper, water pump, timing chain set, timing cover, alternator, etc. I believe above list will be suited for the original heads. The cam also looks really interesting in combination with intake and headers, check this graph, for a 383 Chrysler engine:

Surely this would add to my 400 High Performance engine as well?


If however, the engine shop determines there is extensive work needed to the heads I will probably buy Edelbrock 60929 Performer RPM cylinder heads. In which case I will change the above Performer list to Performer RPM stuff.

My intentions with the Cordoba is to keep the appearance original, reuse as much as possible, but equip with a little stronger gear to get additional torque and HP. The reason for this is I want to sustain driveability as far as possible.

Regarding the A/C. It has never worked during the time I've owned it. I have never missed it and it only adds to the weight of the car. Why do you think I should keep it? Thank you in advance.