Tuesday, February 25, 2014

Work continues

Hey guys,

It's been a long time since last update. Sure enough, I did state in my first post on this blog that work might be days apart, or months apart, but since October nothing has happened on this blog. It's been a bumpy ride, to say the least. After me and my former girlfriend split last summer I met a great girl. We've been working on our relationship since then and it's been great, even though she lives 1000 km away in our neighbor country - Norway.

So what about the Cordoba? No worries guys, even though the blog hasn't been updated the project has not died. I've been focusing on getting new parts and I kind of rethinked the whole idea. Initial thought was to do a complete restoration, including getting the whole thing painted again. However, I no longer think there's a point in this.

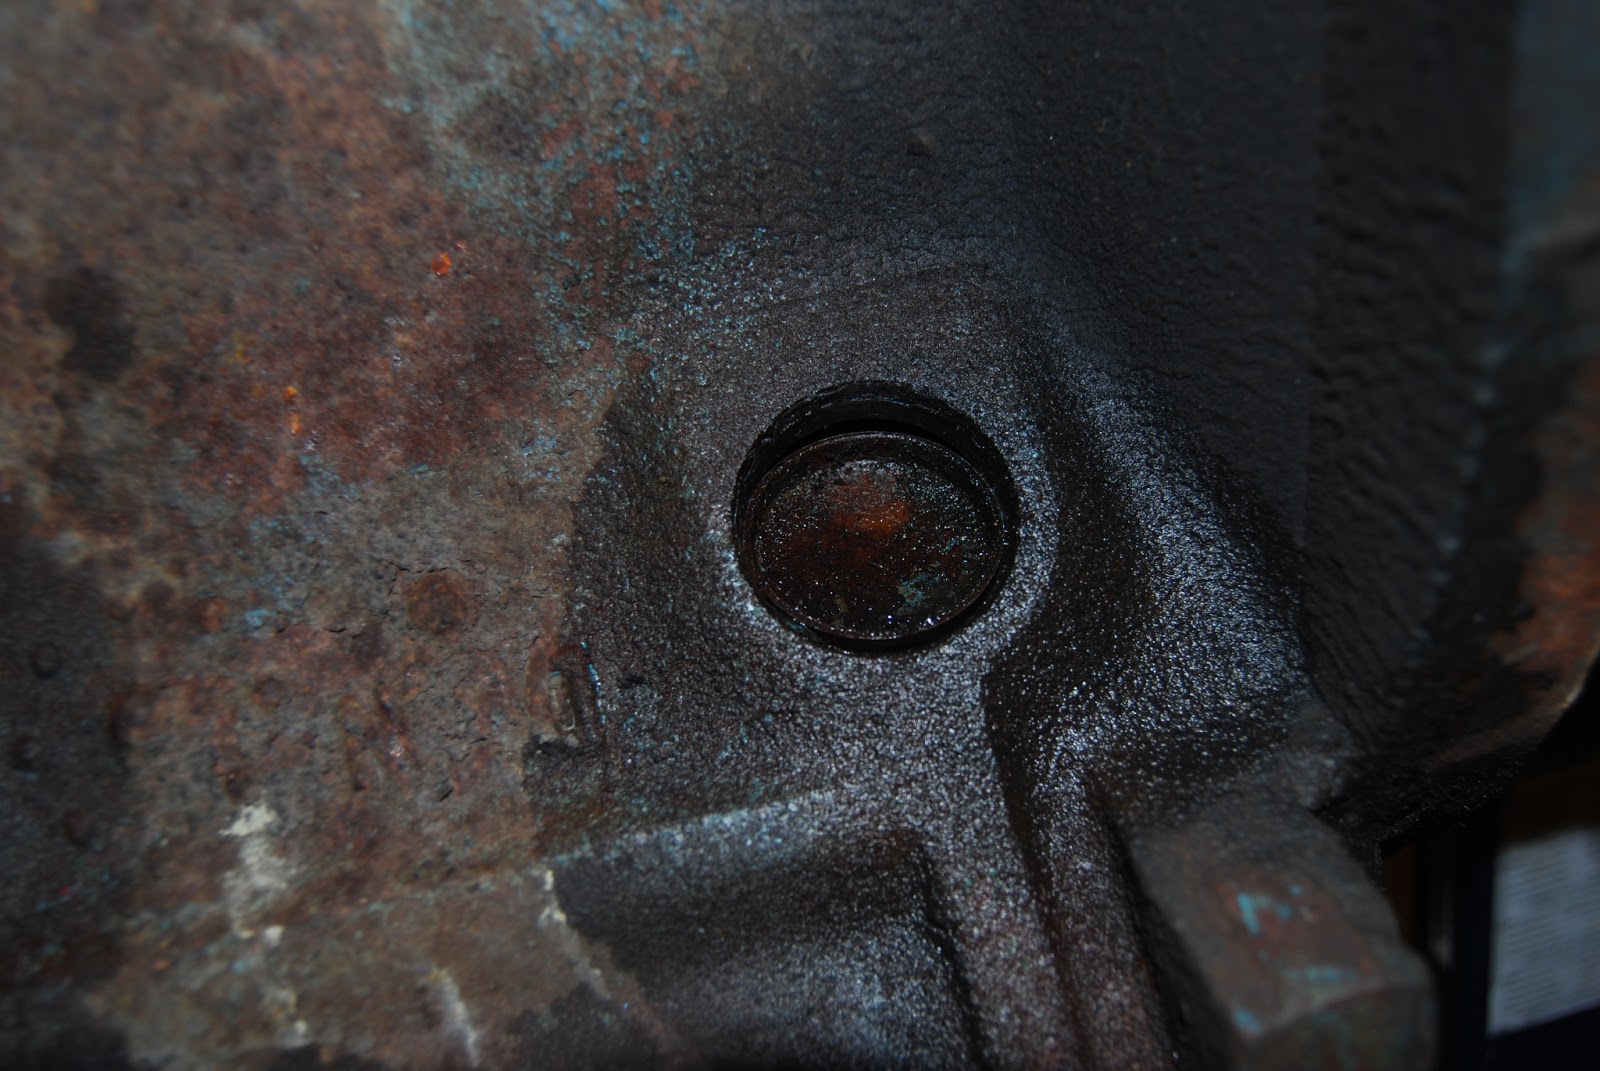
The body of the car is in excellent condition except for the bottom. There's rust around the edges of the fender(around the wheels) and on the bottom of the doors. Also, the floor needs some new metal. But why redo the entire car just to fix these issues? Here's a pic so you get what I mean. Would you consider a paint job if this is the general condition of the car?


So, basically, I will have the rust issues fixed, and get the paint shop to utilize the natural shapes of the car to disguise the sometimes visible difference in the tone(old paint vs new paint). My first priority will be to get the engine compartment and frame in shape again. This is because I have now saved up the money and bought the parts necessary for the engine restoration shop to complete their job. It's just a short matter of time before I have the engine, and can complete it myself. I will drop it in the restored engine compartment, to be able to drive the car to the body shop to have rust issues fixed!

Now for some candy, this is what I bought for the car so far. A picture and a complete list:


* Keith Black Performance Piston and ring kit(KB240KTM-020)
* Mr. Gasket Ultra-Seal full gasket set(MRG-5994)
* ARP Main cap bolt kit(140-5001)
* ARP Connecting rod bolt kit(145-6402)
* Clevite Camshaft bearing set(SH876S)

* Sealed Power Main bearing set(4094M)
* Sealed Power Connecting rod bearing set(8-2320CP)
* Trans-Dapt Performance Timing cover(9392)
* K&N Performance Gold Oil filter(HP-3001)
* ProForm Freezeplug kit(66558)
* Trans-Dapt Performance Engine oil dip stick and tube kit(9225)

* 440 Rear main seal cap + bolts and seals
* ARP Engine accessory bolt kits(545-9801)
* MSD CDI Multi-Spark Ignition(5520)
* MSD Blaster SS Coil(8207)

So, what do you guys think? Am I off to a good start or what? ;)

Friday, October 18, 2013

A year of chaos

Wow! Just wow! That's pretty much all I can say about the year 2013. I haven't been able to focus on this project at all because of the life changing events starting with the breakup with my girlfriend. We had been together for 3,5 years when all of a sudden she decided to leave and completed the process in 3,5 days. Granted we'd not been together for a life time, it still turned my life upside down.

All of a sudden expenses were 50% higher and I was forced to take actions for my financial situation. The worst was without a doubt the fact that I had to decide to move out of the house where I've been living for a couple of years.

However, when I started to get back on my feet I realized I had an opportunity to actually straighten things out that was close to impossible because I was tied to a relationship and obligations earlier. I will swallow my pride and move to my parents house for a few months. This way I can use most of my salary on two main things: A loan at my bank and the '75 Chrysler Cordoba! ;)

I received word from the engine restoration shop a while back and the verdict was just great. I mentioned earlier that I have a documented 31 000 miles on the engine, which must be seen as very little for a 38 year old car so I wasn't really expecting something bad and sure enough. Most of the engine was in perfect condition and the only real wear was within the cylinders which were slightly bigger than usual.

The shop said I could leave it at that but they recommended I did a small bore and go with slightly larger pistons and rings. They instructed me to order standard bearings for camshaft, crankshaft and connecting rods because there were no traces of wear and the crankshaft needed no machining whatsoever. The heads were in equally good condition and only needed leveling and decking, and the valve seats cut.

So, as soon as I get out of the house and all my expenses are cut off I will order the bearings and pistons for the restoration shop and work will continue. I will try to do another update from the garage soon. Also, I want to tell you guys that I changed my mind on going with Edelbrock Performer stuff, and will upgrade camshaft, carburetor and intake to the Edelbrock Performer RPM kit instead.

I think this article may be of particular interest to anyone restoring their 400 big block engine:

http://www.carcraft.com/techarticles/ccrp_1207_chrysler_b_series_400_hemi_power_at_half_the_cost/viewall.html

Monday, March 25, 2013

Day 25 - Engine restoration shop

Okay, so time for another update with some nice progress. A few months ago I told my work colleague that I was restoring my car. Turns out his family had an engine restoration shop since 1979. He took care of all the arrangements and I was promised to be able to help out myself to reduce the price. This is the story. :)

Last Friday I went to the garage to load the engine in to a van.
There were large quantities of ice and snow outside the door of
the garage so I could barely get in and out. Luckily I was able to
move the engine stand easily on the snow...

...and even luckier, it was at a perfect height so I could easily
put the engine down on my own.

On Saturday me and my colleague and great friend Hans went to
the restoration shop Motorrenovering AB in Ljusdal, Sweden.
They had large premises and lots of nice and expensive machinery.
Apparently they are very successful and have a lot of work!

Unloading the engine to get started!

The heavy and greasy, but bare 400 cui engine block.

Camshaft, crankshaft, rocker arm shafts, valve covers and some other
minor stuff getting ready for the first hot tanking. I'm happy at this point. :)

Most of the grease and dirt is gone, but still some rust and paint.

Washing by hand, to get rid of most of the dirt.

And then blowing everything clean with compressed air, so that
water wasn't still there in the cavitys.

The engine block after the first hot tanking...

Getting the hot tanked pistons ready for ultra sonic cleaning.
These will probably not get back on the engine, but we cleaned
them anyway. You never know...

Making sure everything is arranged and that we agree on the
positions. The man on the picture is my colleagues father.

The engine block after two runs of hot tanking. I am moving it
over to wash it by hand...

A lot cleaner than it was before visiting the shop! :)

Another picture of the pretty clean engine block.

All the stuff I brought organized for the employees who will
attend to it during the week! Everything is prepared for them!

Once again, double checking to make sure the pistons are in
their correct places since this is very important.

Some paint, some surface rusting, but otherwise clean components!

And finally. I was thinking on going with these pistons when
I assemble the engine again. What do you think? ;)
That's it for today! I was hoping we could get one of the guys working at the shop to go there over the weekend but there wasn't any time so I left the stuff for machining during the week. Once I know more about the progress I will be sure to update. Sadly there will not be any pictures of machining, but I think we'll survive!

Monday, March 11, 2013

Day 24 - Empty engine block!

Finally. If something is a milestone, this is it! The engine block is now completely stripped from all components. Everything is bagged and tagged and I've been sure to photograph almost everything.Once again the garage neighbour Micke joined me to help out. Great thanks mate!

The oil pump housing was still in place. A couple of firm strikes
with a rubber head mallet, and it gave in...

...this is what the inside looks like.

I had forgotten to remove the fuel pump push rod. This little thingy
pushes on the fuel pump to make it pump the fuel. First remove the allen
head plug visible in the ring. Then just slide the pushrod(arrow) out.

The block has three freeze plugs on each side. I used a large punch
tool together with a hammer and hit one side of the plug. This would
twist it enough to get a hold of it with pliers. Be very careful not to
punch the entire plug into the block. I was very near on the last one,
but managed to save the situation. It would be very trick, if not impossible
to get it out once fully inside.

Pliers did the trick...

Two of the freeze plugs had been replaced with block heaters. Carefully
unscrew the center screw, but be careful not to unscrew it too far. The
inside has a locking mechanism and you don't want that in your block either.

This is what it looks like removed. As you can tell by the picture
once the screw is out far enough, you can just wiggle the locking
mechanism past the block. If you unscrew to much, it will fall into the block.

All freeze plugs removed. Also notice the main bearings that hold
the crankshaft is still in place. Allthough yesterday I unscrewed them
so at this point I could just get them out by hand. Do not loose the
bearings - they need to go back the exact same way for measurements.

The crankshaft removed. You can notice that the drive plate
is no longer attached to it. It was disconnected today but I forgot
to take photos of it. It only goes back one way, so it's an easy deal.

Engine block with lower main bearings still in place.

And not to loose any bearings we reattached the main caps. This
was REALLY tricky. No tolerance whatsoever. Hitting very carefully
with a rubber head mallet did the trick.

Went on to remove the camshaft. Conveniently a bolt can be screwed
in to the end of the camshaft, and at least for me it was easy to slide it
straight out. Be careful, especially if you intend to reuse the camshaft.

Camshaft slowly coming out! :)

Finally. An empty engine block! Just a few bearings and smaller
core plugs in place, but the restoration shop will deal with that!

Kind of surrealistic. I did this. It took me some hours,
but I can finally look back and say I managed to get
everything a part! Hopefully I'll get it together again! ;)
That's all! I will continue updating the progress on the vehicle itself, and in a couple of weeks I'll get back with photos from the restoration shop! Stay with me! :)

Saturday, March 9, 2013

Day 23 - Smaller update

Hey guys,

Just spent two hours in the garage, looking everything through and reading some info in my manuals. I decided to do some minor work while I was there.

I decided to remove the crankshaft and camshaft
sprockets plus the timing chain. There's a bolt in
the center of the camshaft sprocket...

In order to avoid the crank from rotating I put a screwdriver
through the drive plate against the block. Removal was easy.

Notice the woodruff keys that will ensure correct
allignment of the new kit I intend to buy. It is also
crucial to make sure that the new sprockets line up
correctly but I will get back to this on reassembly.

Both sprockets needed a little persuation. Two larger screwdrivers
or pry bars are sufficient if you are careful.

Sprockets and chain disassembled. Time to move on to the final
steps of the crankshaft removal.

In order to remove the crankshaft the first step on big block
engines is to remove the two bolts that keep the rear oil seal
retainer in place. You need a 3/8-inch twelve point socket to
reach these. Afterwards, just slide the retainer up.

This is the rear oil seal retainer. I found it hard to see
if there was a bearing underneath, but I'm thinking
maybe there's an incorporated bearing in the retainer.
Does anybody know this? Please comment.

As a last step I loosened all of the main caps
one quarter turn. After this they were removable
by hand.
I decided not to remove the main caps entirely. I was thinking I should ask someone for a hand. This is for two reasons, I really need to keep track of the caps and bearings to make sure they go back the same way, and the crankshaft can be quite heavy, so I should not take any risk.

A final question. The drive plate is still in place on the end of the crankshaft. According to my documentation I should separate them, but use white paint to mark the position of the drive plate to the crankshaft. Where would be a suitable spot for this marking? Or would it be a better idea to leave the driveplate in place and let the engine restoration shop deal with it? I would assume it just comes out with the crankshaft and I could keep them together?

Thank you all.

Thursday, March 7, 2013

Day 22 - Engine block! Almost there!

It's been a long long time. Truth is I've not been in shape at all for months. I'm still not in a good place but I decided a trip to the garage would be some therapy. My friend HÃ¥kan and the garage neighbour Micke joined me for some additional hands. Big thanks to them! This is kind of an important post, a bit of a milestone. In my latest post I promised to get back on the oil pump internals so I will start discussing this matter.

When I removed the distributor I forgot to pull out the drive gear that is attached to the bottom of it. It stretches down to the oil pump via a shaft.

Distributor drive gear coming out. When it was
removed, the oil pump internals fell out from the
bottom of the engine block.

This is what it looks like where the oil pump used to go...

This picture shows how the distributor drive gear attach to the oil pump,
straight through the block. Providing kind of a double functionality.

I went on to remove the crank shaft pully. Attached with 5 bolts.

Crank shaft pully removed, showing the harmonic damper or
vibration damper. Without this the engine would vibrate to pieces.

I used an air impact wrench to get it off. By doing this, the crankshaft
does not have to be secured. If you are to rotate this bolt by hand, chances
are the crankshaft will just rotate with it, and the bolt will stay in place
unless you lock the crankshaft in to place.

To get the harmonic damper off, a special pulling tool is required.
It is absolutely crucial to make sure this pulls evenly on all sides
since any side force will damage the crankshaft according to Haynes.

Once harmonic damper is disassembled, it is possible
to remove the timing cover. The top 4 bolts are one size
and the bottom 4 are another. Interestingly enough.
And finally, the timing chain is visible. Notice this is
double on the 400 big block whereas a 360 for an example
has one single chain. Despite this, the deflection was really
bad and the chains were quite loose. Acceptable deflection is
a quarter inch, tops!

The fasteners for the crankshaft were already stamped with numbers
1-5, but in order to make it more visible we marked it with a white pen.
This is really when you can't screw things up. Everything needs to go
back the exact same way because of the different wear of parts.

Picture showing our enhanced markings.

We started disassembling each connecting rod. It had two bolts,
a cap and two bearings. One top half, one bottom. We placed the
bolts on their correct sides(rings on the picture) and placed the
bearing and cap in the correct orientation at the side.

While making sure that bearing, rod cap and bolts were still in their
correct orientation we slid the pistons out of the cylinders, and
reassembled them instantly and put them into a labeled box on the
corresponding side.

Piston 1 with connecting rod, labeled and reassembled in box.
Also, the two halves of the connecting rod was already stamped
from factory, further giving a good idea which is which.

Three pistons in the box.

All pistons and connecting rods removed from the engine block!

Labeled and organized. I will buy some plastic bags that I can
wrap around each connecting rod, to make sure the bearings can't
get far from their correct rod.

And finally, placed the box, with everything numbered in front
of the engine, to demonstrate orientation.
That's all for todays post! You have to admit I'm really getting there! ;) The last weekend of this month, me and my colleague will head to his familys engine restoration shop to get things cleaned and measured. Can't wait to update about this!